
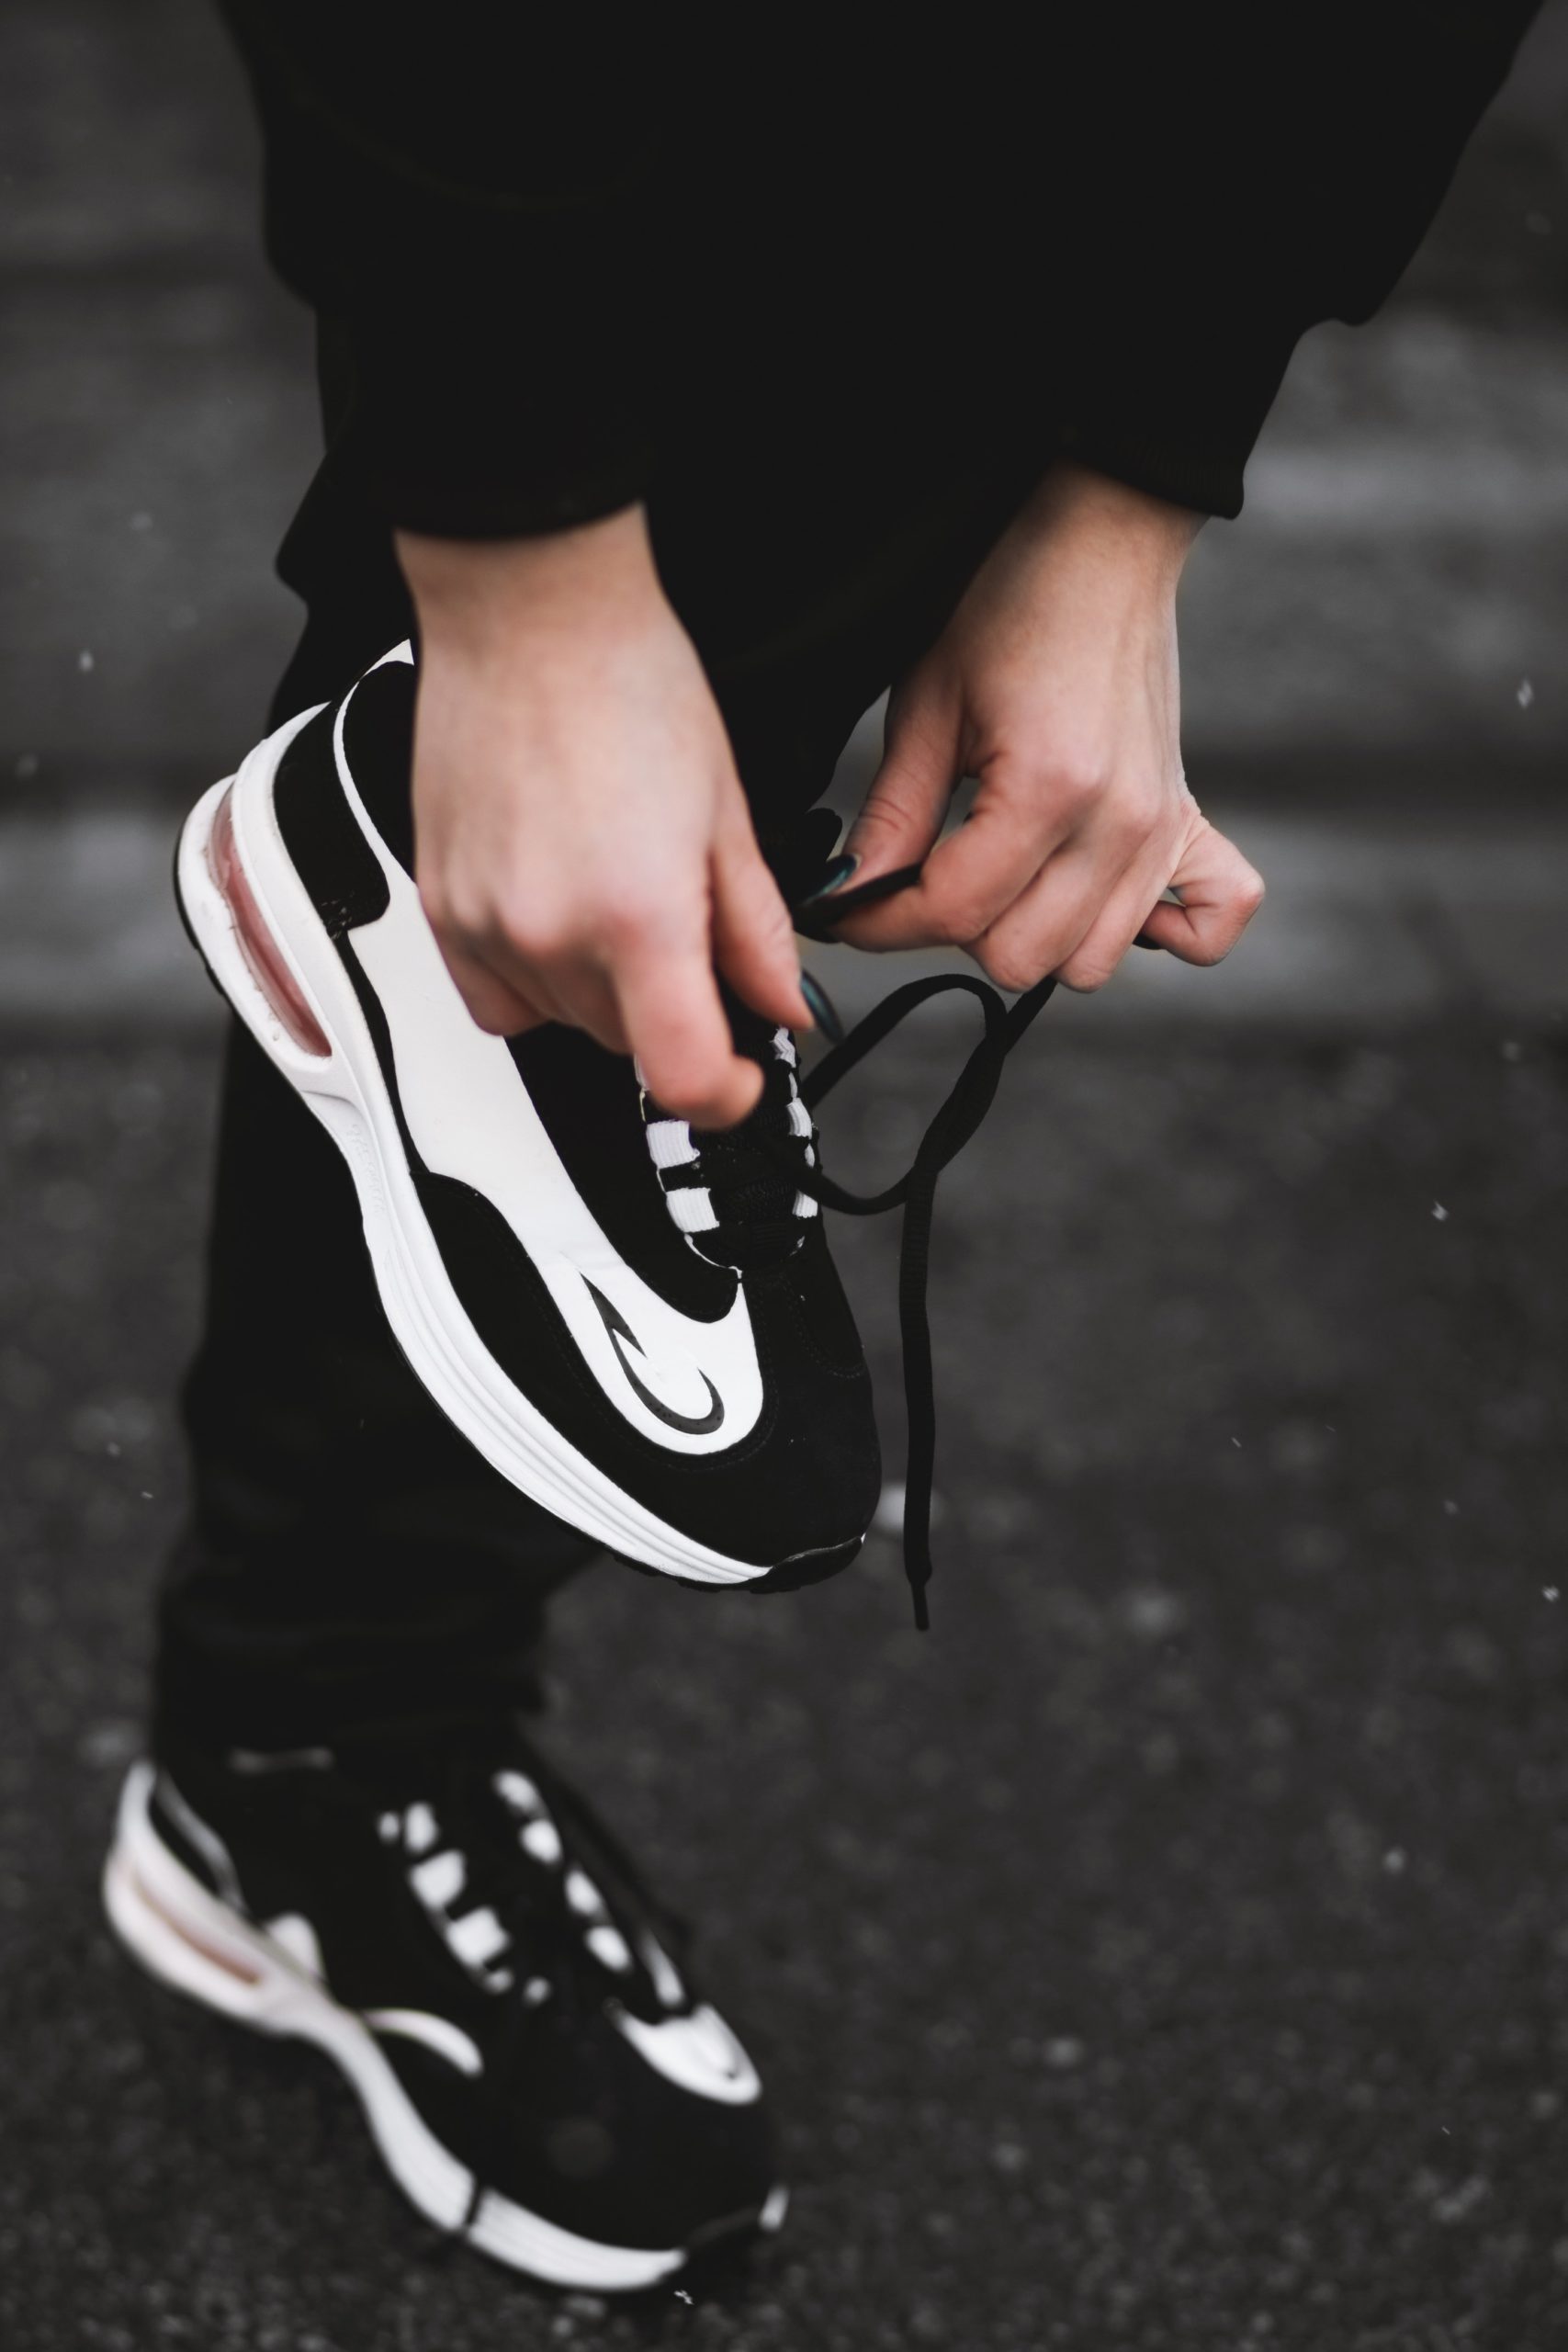
Wearing the right running shoes for your foot shape and size is one thing, but inside these shoes you’ll need to keep your feet where they need to be. An adjustment of your laces can reduce the chances of discomfort, irritations, blisters, and black toenails. Different lacing methods might be a solution for some shoe fit problems.
Wear the right running shoe in the right size
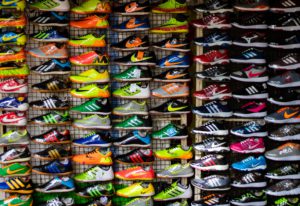
You can try different lacing techniques, but when your shoe doesn’t fit properly, good lacing won’t help you either. What is the best running shoe for you, depends on many aspects such as your foot shape and size, the way you run, the running surface, your body weight and your personal running goals. It is not recommendable to select shoes just by their look and feel, as you might end up with shoes that are not supportive to your feet’s needs. Choosing the right running shoes according to your feet needs, and wearing them in the right size, is essential to minimise the risk of injury.
Wear good quality running socks that fit well
Runners blisters are caused by friction. Wearing the wrong type of socks, that are not seated well can cause an extra rub against your skin. Good quality running socks, that are made of synthetic fibres instead of cotton, are highly recommended, because they lead moisture away from the skin. Find socks with a smooth surface and no seams, like Wright Running Socks. They are anatomically shaped, which prevents the sock from wrinkling and causing friction.
Lacing methods to target your shoe fit problem zones

If your shoe doesn’t fit properly in the first place, then don’t expect any major shoe size adjustments by different lacing. But when your shoe is just a bit off, different ways of lacing your shoe can target certain problem zones of your foot:
- Heel-Lock lacing (2 methods) is useful for heel slipping problems.
- High instep lacing can help relief local pressure on the top of your foot.
- Wide forefoot/ bunion lacing will give a little more room to wide forefeet or people who suffer from bunions
- Overall wide feet lacing creates a little room in the overall shoe.
- Diagonal lacing gives a little more space to an injured or longer big toe.
Important note for all lacing methods: don’t lace your shoes too tight or too loose. Divide the pressure across your shoe lacing evenly and tie your laces comfortably. The holes that the laces go through are called eyelets. When I mention the top of the shoe it refers to the first eyelet, closest to your heel. The bottom of the shoe is the last eyelet, which is located closest to your toes.
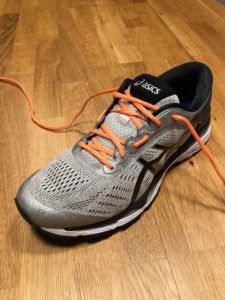
1. Heel lock lacing – loop through that extra eyelet on the top
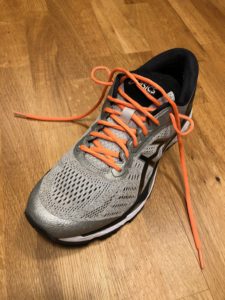
This lacing method helps prevents the heel from slipping up and down the shoe, (which can lead to painful heel blisters. It tightens the circumference of the shoe around the heel. Locate the extra eyelets on your shoes (the ones closest to your heel). In a new pair of running shoes these eyelets are usually unlaced. Weave the end of your right shoelace through the extra eyelet on the right side, going from the outside towards the inside of the shoe. Stop about halfway, so you’ve got a loop on the outside of the shoe. Repeat on the left side.
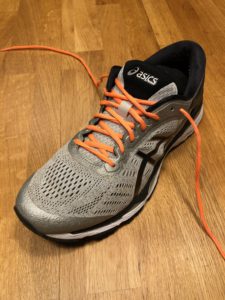
- Cross the ends of your shoelaces, then weave the right end of the shoelace through the loop on the left side, and vice versa.
- Pull the ends of your shoelaces to secure the loops and tie your shoelaces normally.
- Tie your shoelaces comfortably.
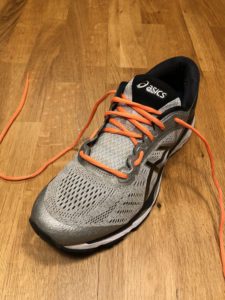
2. Squeeze the heel in the back of your shoe – skip second eyelet
If the heel lock method seems to put too much pressure on the top of your foot (especially during long distances), then this second lacing method might be a better solution. It also prevents heel slipping as it squeezes your heel in the back of the shoe.
- Keep your shoes laced normally, but keep the top two eyelets unlaced (included that extra eyelet on the top).
- Skip the eyelet that is second to the top and weave the laces normally through that extra top eyelet, going from inward towards the outside of the shoe.
- Tie your shoelaces comfortably. You don’t need to tie them extra tight.
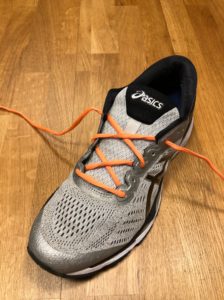
3. Window Lacing for high instep – skip eyelets on the mid foot area
An high arched foot or a higher shape of the mid foot relates to an higher instep. Window lacing can help to decrease some pressure or irritation on the tops of your feet while you’re wearing shoes. It creates a window (gap) in the lacing pattern to accommodate your high instep. This method adds some extra room to the higher mid-foot, which will reduce pressure.
- Unlace the first three or four eyelets. Make sure you unlace down to the eyelet that is just below the pressure point. So your shoe is only laced through two to three of the eyelets at the bottom (depending on where the top of the foot is the highest).
- Weave the end of your right shoelace through the eyelet directly above it, going from the outside toward the inside of the shoe. Do the same on the left side.
- Then cross the laces over again and finish lacing up the rest of the shoe.
- Tie your shoelaces comfortably.
4. Window lacing for wide forefoot or bunions – skip eyelets on front foot area
Make the front of the shoe a little wider when you have a wide forefoot or suffer from bunions. This window lacing method can relief some tightness at the front of your shoe and it can also give some room to (or prevent) bunions.
- Unlace the shoe all the way to the bottom eyelets (right and left).
- Weave the end of your right shoelace through the eyelet directly above it (going from the inside to the outside of the shoe).
- Now weave the end of the right shoelace through the eyelet directly above it again, this time going from outside to the inside of the shoe.
- Do the same with the left shoelace.
- Lace your shoes normally from here.
- Tie your shoelaces comfortably.
5. Window lacing for overall wide foot – skip every other eyelet
In case you have very wide feet, make sure you wear wider-sized shoes. But if you just need to give your shoes a little more space you might try this lacing method. You skip every other eyelet to create in the whole shoe a little more space.
- Unlace the shoe all the way to the bottom eyelets (right and left).
- Start lacing your shoe normally, but skip the eyelets that are directly above the bottom eyelets (on both sides).
- Continue lacing the shoe, skipping every other set of eyelets.
- Tie your shoelaces comfortably.
6. Diagonal Lacing for toe (nail) injuries
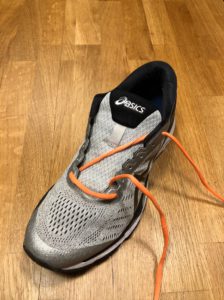

Always wear shoes in the right shoe size, but if your shoes feel a just a bit too tight at the biggest toe, because it was bruised or when you have a black toe nail, this lacing method can help. It gives the shoes that little extra room for the injured toe to heal.
- Remove the lace completely from the shoe.
- Weave one end of the shoelace into the bottom eyelet (the one closest to your big toe). Go from outside the shoe toward the inside of the shoe.
- Pull the shoelace diagonally and weave it through the top eyelet on the opposite(diagonal) side. Go from the inside to the outside of the shoe.
- Give enough length to the lace at the top to be able to tie them, once the whole lace is in place.
- Move on to the other end of the shoelace and weave it through the other bottom eyelet, going from the outside toward the inside of the shoe.
- Weave the shoelace diagonally through the next eyelet on the opposite side.
- Weave the shoelace through to the next eyelet directly across going from the outside toward the inside of the shoe.
- Repeat this lacing pattern until you get to the top eyelet.
- Tie your shoelaces comfortably.
It’s so much more-fun-2-run when your feet feel most comfortable. I hope these running shoe lacing methods will help you tackle your shoe fit problems. Let me know if you have any questions or if you‘d like to share additional lacing solutions that work for you. You can send me an e-mail at an*******@mo*********.com or leave your comment below.


Wow, I definitely see how lacing can help and it is something I have overlooked for so long! I am going to try the heel lock lacing number one today and hopefully say goodbye to heel blisters.
Glad I found this post!
Hi John, great you’ve found this post. let me know how you go with the heel lock lacing! Good Luck!
Interesting article! I’ve been trying out different shoes as I’m trying to find the right one for starting running again (after a pause for a few years). I have small feet so lacing is a key thing for me to make sure the shoe fits well before running. Looking forward for more!
Thank Sarah, Thanks for your comment. Let me know how you go on re-starting the running. Good luck!
I am trying to get back in shape and have been having issues with my feet since I started my morning jogs. I have wide feet so I am going to try that lacing technique. Thank you for the great info!
Hi Randi, thanks for your comment. Good luck with this lacing technique. Let me know how you experience it.
As someone who has done a fair amount of hiking and suffered my fair share of blisters, I was shocked that I’d never thought of how much a difference these shoe lacing techniques could make.
Will certainly be bookmarking this page and having a re-read before my next weekend away. Be interested to see how much a difference these techniques will make, and which technique best suits my feet and my hiking boots.
What an interesting article. I never use that extra eyelet at the top of my trainers and I’m shocked when I have foot cramps on my foot after running. Thanks for the great hack
Thank you! Good luck on your next run!